
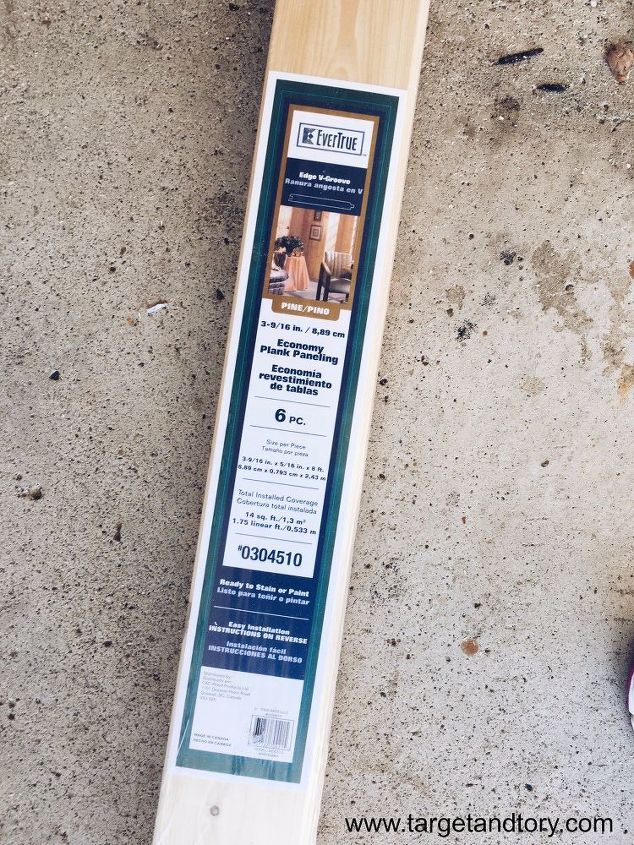
I went to Lowe’s with a basic plan. I knew I wanted 1×2 furring strips for the inside posts. At only $1 for 8 feet, how could I not? Then I remembered the rolling shoe storage I made for my mudroom (http://www.targetandtory.com/diy-laundry-room-makeover/). I used tongue and groove planks there, and decided this is practically the same and bought some more.
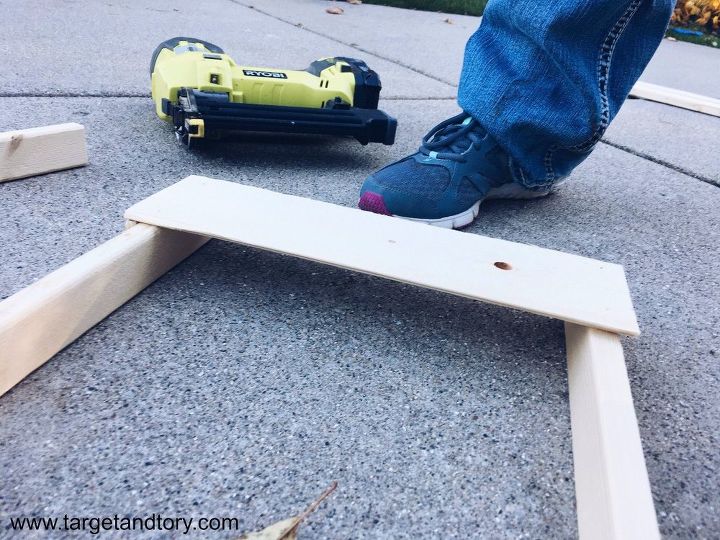
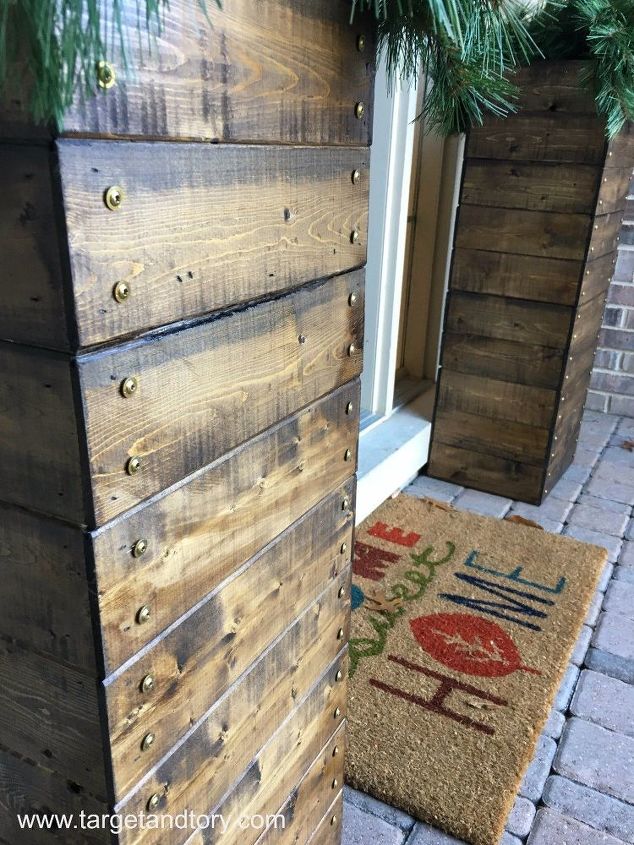
I purchased a planter from Lowe’s and then started winging it. I cut the furring strips to 35″ with my miter saw. I then placed them on the sides of the planter to get an idea at how long I needed to cut my planks. I ended up needing 12.5″ on 2 sides (I made sure there was enough overhang so the side pieces would fit up against it) and 10.25″ on the other 2. I attached all of the planks with my Ryobi Nail Gun.
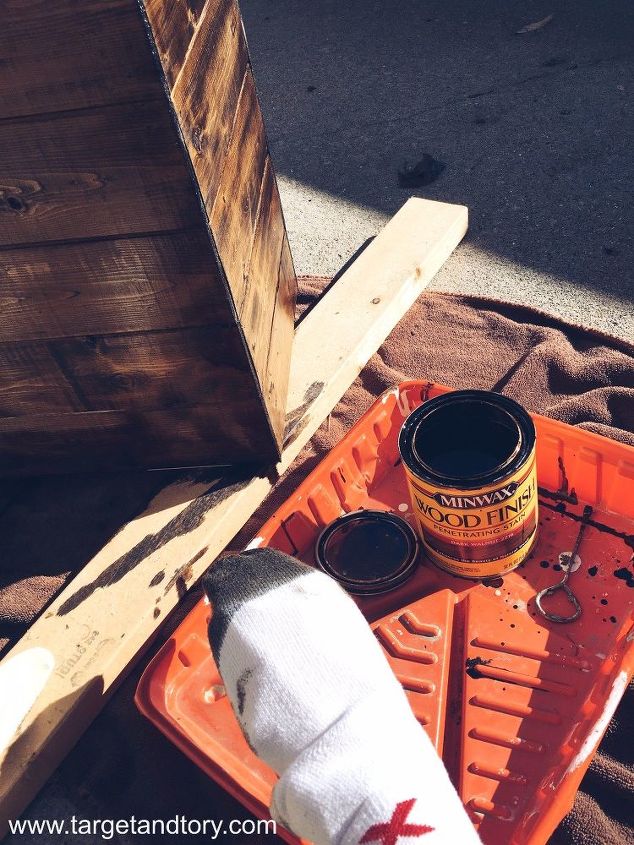
Once it was built, I stained it with my current favorite color. Minwax Dark Walnut. I always use a sock when staining. I finished it off with a top coat of spray poly in satin.
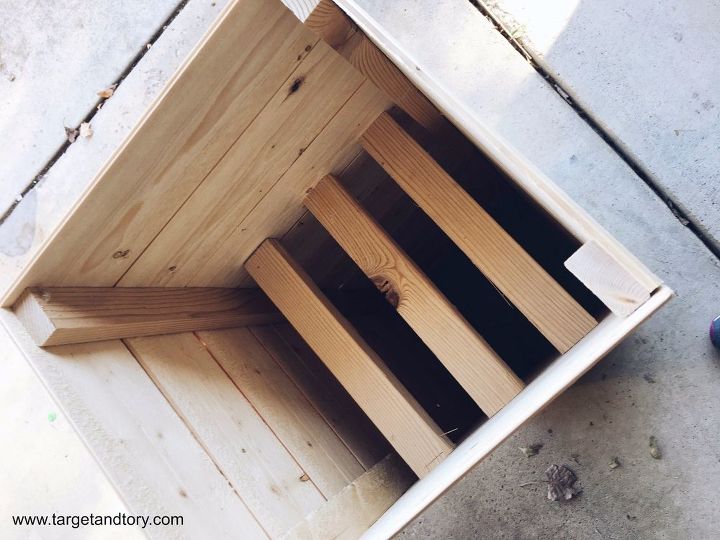
I needed a place for the planter to sit on, so I added a few furring strips 9.5″ down and nailed them in as well. The original post that I was following on Pinterest added a lot more work (pocket holes, etc). I could (should?) have done that, however I didn’t feel it was necessary for my purpose.
I went to JoAnn’s and bought items to fill the planters at 50% off, which I swear is still so expensive! Each planter cost $20 each to fill.
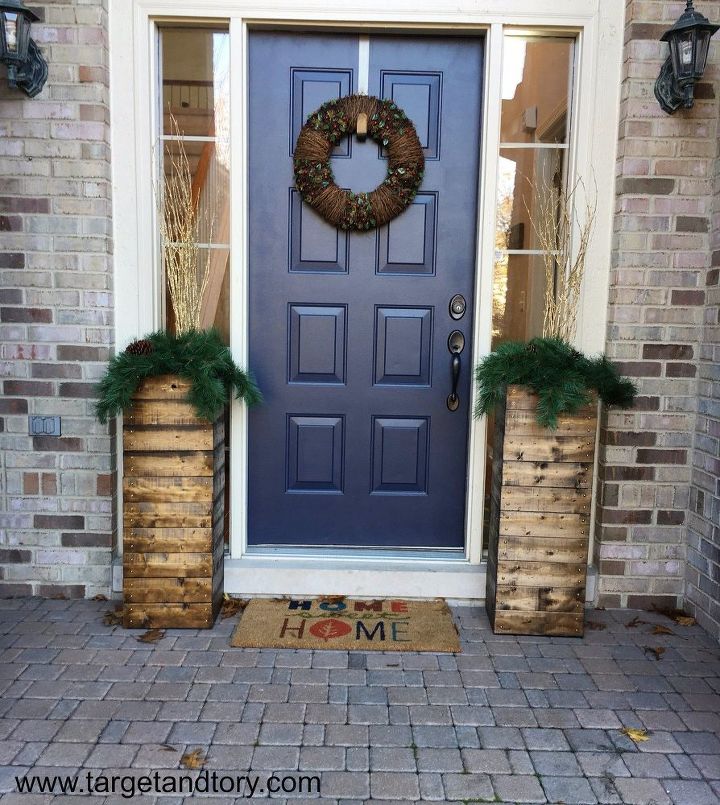
Once I had them up I thought they looked a touch boring, but I liked it, but I was torn. I decided to make a template out of cardboard and add gold screws.
I then decided to see what it would look like for the holidays if I added some red to the decor. I love it! (Pic was taken before the gold screws were added)

There’s a few more DIY projects over at the blog if you want to check them out!
Leave a Reply