
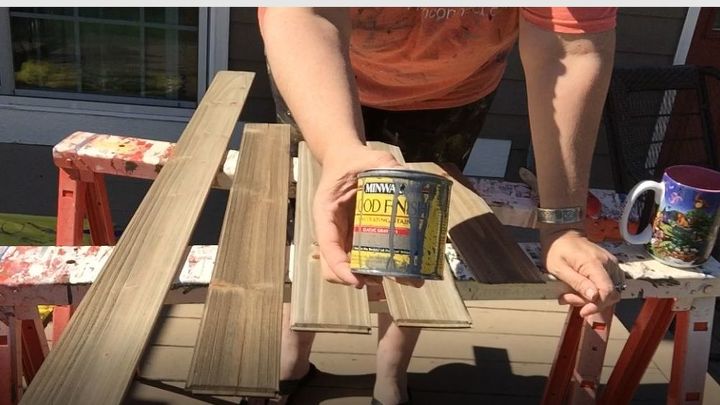
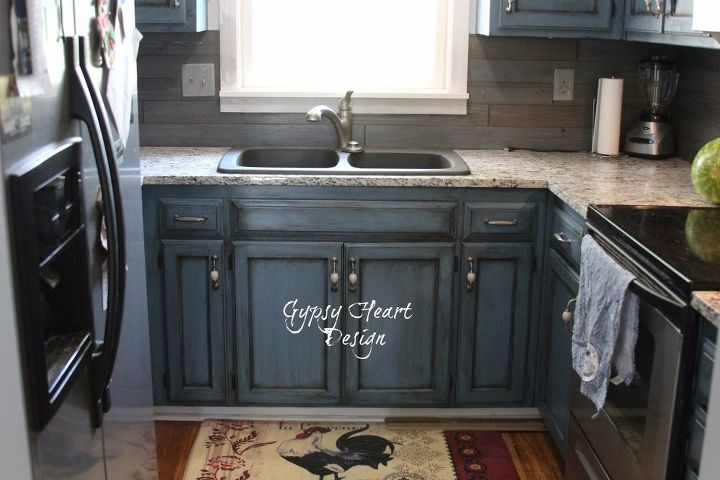
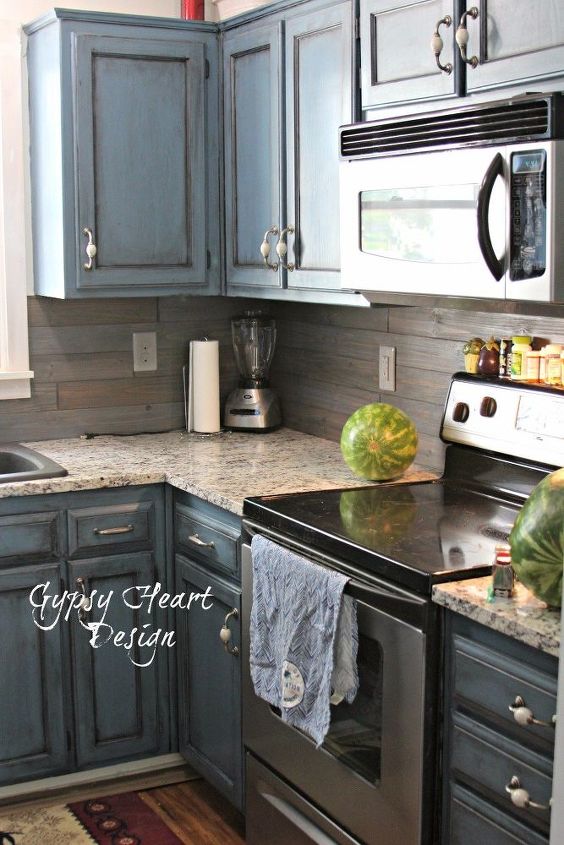
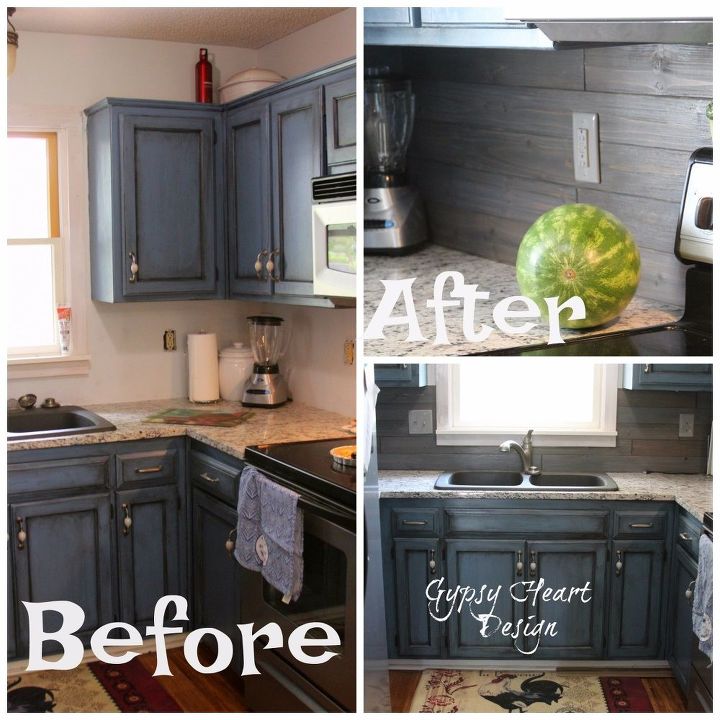
I decided that what I used needed to be grey to go with the rest of the house and match the cabinets better so I chose Minwax Classic Grey Stain from Lowe’s for a cost of about $10.00.
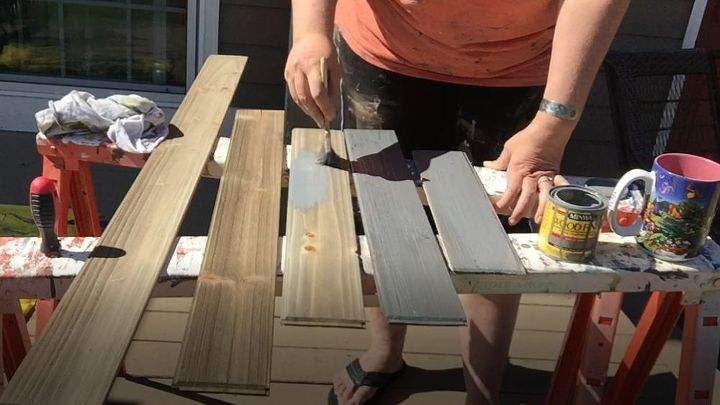
I stained the boards and wiped the stain back.
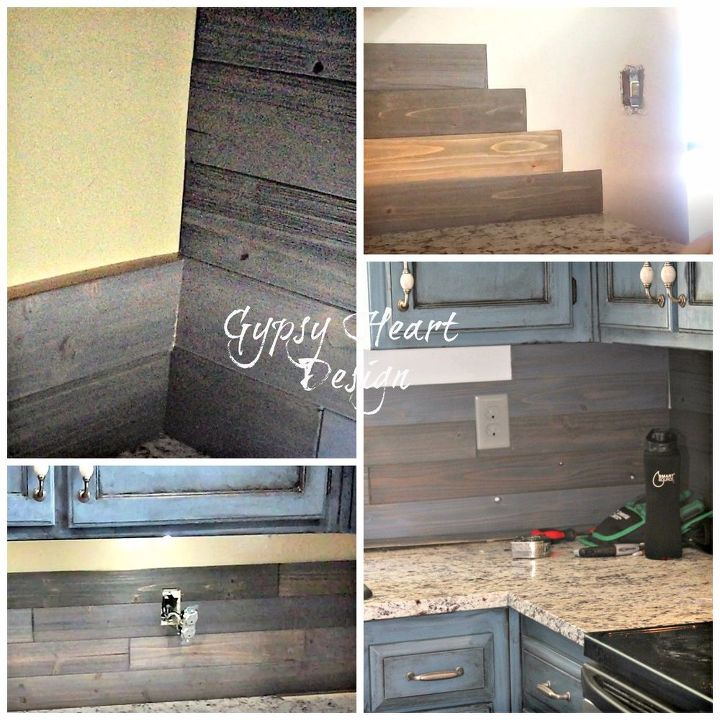
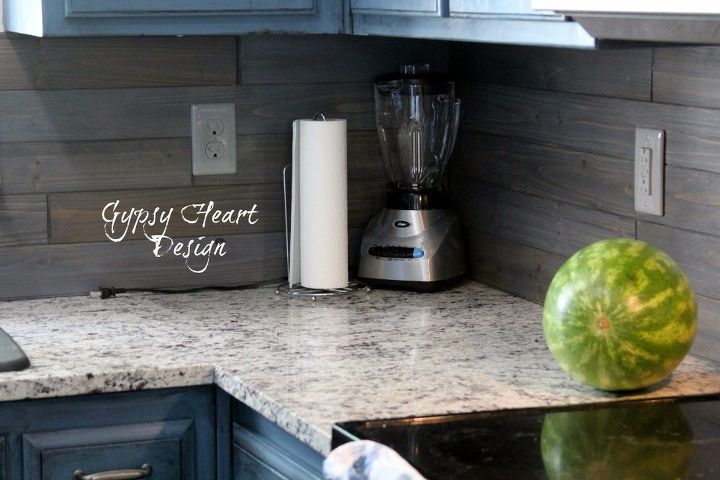
Once they were dry I started putting the boards up. After all the boards were in place and nailed in, I sealed it with Minwax Polyurethane and caulked with clear caulk where the backsplash meets the countertop for waterproofing.The result? A fabulous looking budget backsplash for about $76.00 plus tax!
Pages: Page 1 Page 2
Leave a Reply